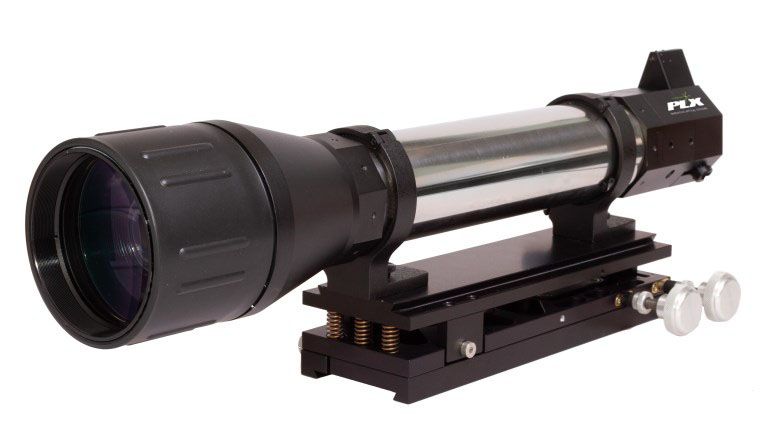
ACT-HR100 HIGH-RESOLUTION ELECTRONIC AUTOCOLLIMATOR
- Large Clear Aperture of 100mm.
- High-resolution measurement capability down to 0.01 arc second or 0.05 μRad.
- Real time measurement of angular displacement.
- Automatic angle deviation display.
- Relative measurements.
- Built-in pan and tilt adjustments.
- Built-in coarse aiming laser.
- Multiple results display.
- Low Light - low reflection capability.
- Reticle targets (single or multiple).
- Data logging with detailed statistics.
- Software controlled electronic shutter & gain.
- Data exporting to another computer via RS232 or TCP/IP.
- Video with playback, snapshot files.
- Complete with full software suite for recording and documenting measurements.
Electronic Autocollimators:
- ACT-25B Electronic Autocollimator
- ACT-25FO Autofocusing Electronic Autocollimator
- ACT-25LA Laser Analyzing Electronic Autocollimator
- ACT-HR High-Resolution Electronic Autocollimator
- ACT-HR100 High-Resolution Electronic Autocollimator
- ACT-WF Wide-Field Electronic Autocollimator
Related Products:
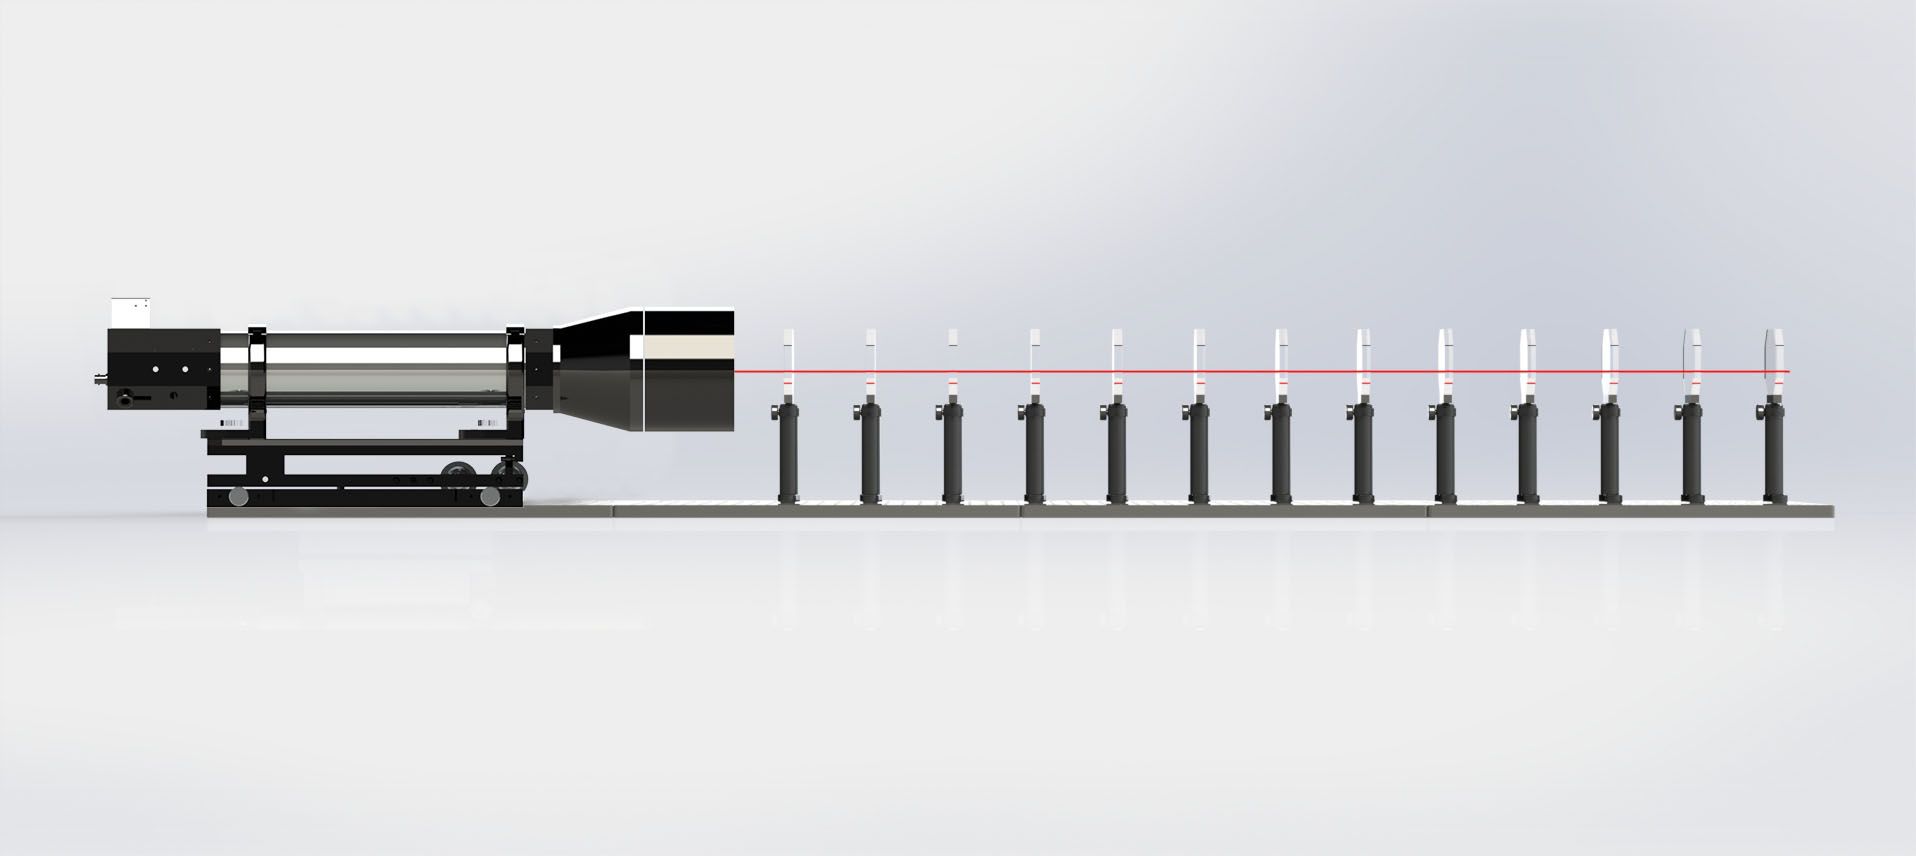
The large aperture on ACT-HR100 Electronic Autocollimator enables parallel testing of multiple mirrors or multiple laser sources that could be fitted within the 100 mm aperture, it will measure extremely small angular displacements, squareness, twist and parallelism.

The ACT-HR100 features a large, clear aperture of 100mm and performs high-precision reflection measurement from mirror surfaces down to 0.01 arc second.
It can be utilized in numerous applications and a variety of areas including:

-Straightness measurement of linear stages
–Characterization of rotary stages
–Measurement of wedge, prism and polygon angles
–Measurement of reflecting surface parallelism
–Measurement of surface flatness
–Alignment of optical setups including lasers
–Measurement of mirror angles
–CD/DVD-Rom alignment
–Thermal stability measurements
–Vibrations analysis and much more.
Machinery Alignment
The Autocollimator/Telescope can be used for checking the accuracy of machine slides. To check the slides, mount a mirror to the machine table. The mirror is facing in the direction of travel. The autocollimator is aligned to the mirror, and the table is then moved either continuously or in discrete steps. Any error in the movement of the table shows up as the reticle image moving.
Optical Testing
The electronic autocollimator can be used for testing various optical components. Some can be measured directly, and others would require the use of supplemental optics.
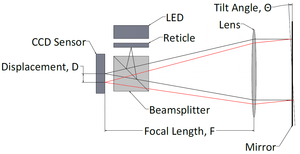
When using the autocollimator mode, it is important to understand the display readout. The autocollimator scale is set up to measure mirror tilt, not the beam angle. When a mirror is tilted, the reflected beam is deviated by twice the angle of the tilt.
Boresighting
Boresighting is the aligning of a targeting system or systems with the barrel of a weapon, or the co-alignment of different targeting systems (visible and infrared). Boresighting will typically require some additional set-up/equipment. This could take the form of an accurate translation stage or an LTHR or periscope possibly equipped with a beam splitter.
The set-up here is highly dependent on the configuration and number of objects being bore-sighted.
Software
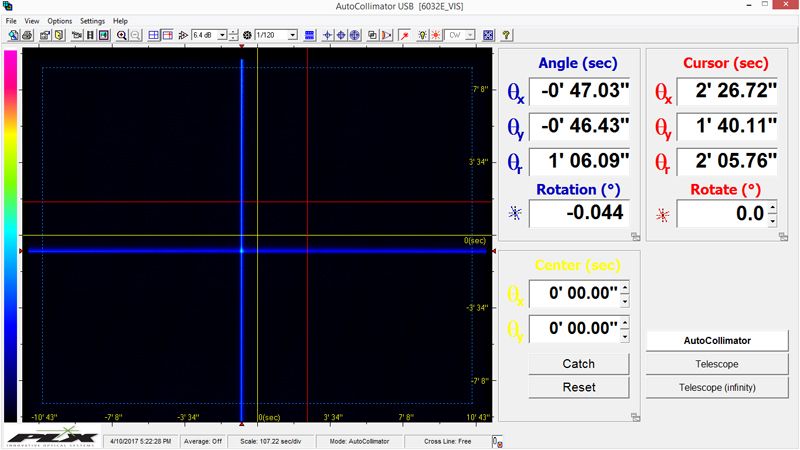
The software automatically displays angle deviation and can give the relative position of multiple targets.
Data logging is supported and can be configured to record for a predetermined time or a fixed number of data points. The recording interval can also be set. The data can be saved to a file or streamed to a remote location via RS-232 or TCP/IP. The communication setting for both RS-232 and TCP/IP is fully configurable from the software.

| Specification | Value | 3D Models & Diagrams |
|---|---|---|
| Autocollimator | ±17.2’ (H) x ± 10.3’ (V) ± 5 (H) , ± 3 (V) [mrad] | Click Here |
| Telescope | ±34.4’ (H) x ± 20.6’ (V) ± 10 (H) , ± 6 (V) [mrad] | |
| Resolution | 0.01 arc second | |
| Accuracy | 0.5 arc second | |
| Light Source | LED- 650 Optional: 1060, RGB. | |
| Interface | USB 3.0 | |
| Clear Aperture | 100mm | |
| Retro-reflector for alignment | Ø64mm, N.W. 280g | |
| Thread | Ø16mm, <5” | |
| Coarse alignment laser | 638nm power <1.0 mW Class 2 laser product, IEC60825-1 | |
| Pan and Tilt knobs | Tilt ±2°, Pan ±2.5° | |
| Housing Size (L x W x H) in mm | 635 x 184 x 208 | |
| Power Requirements | ~2 Watt (Via USB 3.0 interface) | |
| Weight (typical) | 5 kg |
Metrology System for Inter-Alignment of Lasers, Telescopes, and Mechanical Datum: Poster Presentation at OPTIFAB.
Advances in sensor technology have opened the door to new measuring instruments, initiating the development of the new PLX, ACT-25 and ACT-HR Electronic Autocollimator and Alignment Telescope Systems.
The technology is based on autocollimation principles combining laser beam collimation and direction measurement, accurate telescopic measurement, focusing techniques with sophisticated software and computing techniques. Of special interest is the laser analyzing autocollimator since it combines laser-analyzing technology with angular reflection technology.
PLX’s "Metrology System for Inter-Alignment of Lasers, Telescopes, and Mechanical Datum” abstract / manuscript accepted at SPIE for inclusion in their Library of Technical Papers.
In modern scientific and industrial laser applications, inter-alignment of multiple optical devices is frequently a basic requirement to meet a certain specification and performance.
However, the designed optical system combining mechanical elements, lasers and optical sights in various wavelengths frequently deviates from specified

